I bought mine from Tokyu Hands at Osaka. I wasn't really expecting I'd find one there. I was lazily browsing their small Lomography section and when I turned over this old-looking box set (the plastic cover was already yellowish! haha), it happened to be a Last Camera kit! And it was their last stock!
Unboxing the Kit:
BEST. PACKAGING. EVER. All the parts were grouped per camera section and each group was individually packed. It also came with an instruction manual that was very easy to follow. Kudos to Superheadz! You really know how to produce a DIY camera kit.
Before starting, I laid out all the section/piece based on the parts layout in the instruction manual. This really helped me identify what part I should use when I was building the camera. Tip: don't remove the parts yet from the frame. If you notice the small squares in the corners of the frames, they actually indicate the number label of the part. The instructions use these numbers to identify the piece (e.g. 5-5, which is piece # 5 of section 5) so make sure you don't separate them just yet to make it easier for you to find the right parts.
Unfortunately, I wasn't able to really document the building process since I already got lazy with taking pictures.
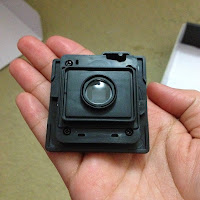
Definitely the most frustrating part was attaching the shutter levers of the lenses (see below). You would have to attach this really small spring into two hooks and make sure the lever will stay in place while you put the lens frame to cover it. It's really harder than it looks! And you would have to do it twice because there are two lenses! O_O This is where having a pair of tweezers would really help you so make sure you find one before building this.
 |
| CURSE YOU STUPID SPRING! |
This was one of my kilig moments: trying out the advance knob and hearing that familiar "kraak kraak" sound. It meant that so far, I was building it correctly hehe:
All in all it took me around 5 hours to finish the camera (shet haha) but I would gladly do it again since it was so much fun! I would definitely recommend this DIY project!
 |
| 45mm lens (standard size) and 22mm lens (wide) |
 |
| 45mm lens (standard size) and 22mm lens (wide) |
 |
| Back Cover with the light leak hole |
 |
| Removal Panels of the Front Cover |


No comments:
Post a Comment